Showing posts with label Organizing. Show all posts

Thursday, April 4, 2013

Classy Quick Notes


How many times have you had to write up a quick little note and either mail out, leave behind or give to someone else?  A Post-It works fine, a scrap piece of paper will do the trick, but will it be professional?


Leaving a note for your kids are one thing, most of the time a piece of paper with a quick smiley face is enough to get the job done, but can the same thing be said about a client or a customer?  Sometimes including a classy note with an order or as a "thank you" can be a heck of a lot more memorable than a white lined paper you tore off a note pad.


Not to mention how they feel when they see a stunning envelope in their mailbox that does NOT resemble a bill!

Presentation is everything and setting yourself apart with a something as simple as a note, is a GREAT way to get you and your business noticed...in a positive way!

Plus, they are easy to make or even easier to order!

Enjoy!
Suzanne

Tuesday, March 19, 2013

Getting Down to Business

I have an INCREDIBLE network of entrepreneurs that have given me amazing advice, become great friends and even used me for my perky personality!  =)  They have supported me over the years, encouraged me when I am frazzled and cheer lead like there is no tomorrow.  In all honesty, I am extremely blessed!

After taking a few years off from the world of owning my own business, there is nothing more important than going back to my roots per se.  After sifting through all of the past brainstorming sessions, networking meetings, radio shows, podcasts, blogs and silliness at local restaurants; one thing still rings true.  The brilliance of simplicity.

Stuart Preston told Vicki Riley her time would be better spent without a needle in her hand.  Vicki is the creator of Dinky Baby and at the time when we were all struggling to get our businesses off the ground, Vicki was MAKING Dinky Baby dolls.  With those few little words of wisdom from Stuart, Vicki went from making the actual dolls to creating patterns so EVERYONE could make a Dinky Baby.  Can anyone say, "Brilliant"?

Although I am not in the "business" of making dolls or patterns for that matter, it did get those creative juices flowing in my brain.  I have already made that first jump to figuring out what I do best and re-situating my blog to fit my little niche now it's time to take it a step further.

It is time to put everyone's good advice BACK to work.  It's time to get the show on the road and that's exactly what we will be doing!

There will be a lot of updates, changes, consolidating, building (literally and figuratively) and learning over the next few months and I am beyond excited!

One of the latest and greatest additions to our Gooseberry Cottage blog is our newsletter!  If you haven't done so, please sign up just to the left of our posting or click here to sign up!  Our newsletter will be PACKED full of fun tidbits of the going's on around here, techniques for sprucing up your cards, new products, classes and you'll be the first to be "in the know" of our future endeavors!

Of course, if you have any words of wisdom, suggestions, two cents and brilliant epiphanies PLEASE share!  I can use all I can get!  I should probably break out the ol' whiteboard and find some wall space, because I am going to need it!

Thank you so much for all of your support and patience during this exciting time!!!

Happy Stamping!!!

Suzanne


Thursday, March 14, 2013

Evernote Update

I have been having a BALL updating and playing with Evernote.  I am so thankful that I stumbled upon that post on the Stamping Connection and decided to download!

I am slowly but surely getting all of my stamps uploaded and it has been easier than I thought!  One of the really cool things that I didn't know that it was capable of was searching for words within the images!  For example; I was looking for a Just a Note stamp for a card order and as I started to type I saw images that I had "tagged" AND ones that actually had that in the words of the stamp image itself!  At first I thought it was a fluke, so I tried it again and again!  I was SHOCKED!!!!  Talk about EXCITING!

Once I got my feet wet with the stamp inventory, I moved onto something else.  Recipes!

Right now, I keep them either in the Card Class Project List or on those cute snarky comment recipe cards from Michael's.  The recipe cards are nice to use and I love filling them in while I am doing a card, but it is RARE that I go back to them and it doesn't have an actual picture of the card I made.  Hmmmmmm.  Evernote??

YES!  I created a new Notebook and labeled it Recipes and now I put in my recipe for the card AND the picture front and back.  Talk about wonderful!  I am not sure if I will go back and put in past cards and recipes, but I am going to start doing it going forward.  I figured it would also be a great way for me to see which stamp sets are being used and which are collecting dust.

So far I am really enjoying Evernote and I think the next experiment is going to be with my downline!  So get ready, ladies!  An email will be coming your way shortly!

Happy Organizing!

Suzanne

Wednesday, March 13, 2013

Sew Cute

A craft room or space is more than just a place to "dump" all of your goodies.  It is a sanctuary, a haven, a place where you can go and let your mind create.  It is a place to be inspired, a place to feel alive and a place where you feel all warm and fuzzy to be in.

My parents moved back in October and it has taken until March for my mom to FINALLY get her sewing put together and when she finally got around to it she turned her sanctuary into more than just a sewing room, she filled it with memories.

Family photos

Bookcases that hold more than just books, but a travelling Raggedy Ann and mementos from friends.  Plus a bunch of cross stitch projects I made for her YEARS ago!

A place to sit and read

Framed book of poems
My mom told Garrett and I this wonderful story of this cute little book of poems that my Grandma used to read to her and her brother's and sister's when they had a tornado warning.  They would all be wrapped in their favorite blankets, snuggled in the hallway, while my Grandma would read poems to them.  I believe my Aunt Net has the original and she found a copy at a used bookstore and sent one to my mom.  She keeps it framed in her sewing room.

A nice reminder when the day seems to be going a bit awry!

Lots of fun ribbon

Her sewing machine with the cute bunny cover my grandma made for her.

Patterns

Stamping station
I love the fact that my mom is surrounded by all of her happy memories, her pretty things and items that were either made for her or given as gifts by those she loves.

Love you, Mom!!!!

Monday, March 11, 2013

Single Stamp Storage

I am pretty sure I have the hubby talked into making me one of those super cool single stamp displays this summer.  However, I just don't have the room to wait so I improvised!

Single Stamps - Buckets and Baskets

Gotta love IKEA!

I picked up the rods and metal buckets before I moved to New Mexico because I figured I could use them for some of my supplies and they would look cute under the window.  I was limited to what I could put underneath of it because of bookcases and tables and this just worked out PERFECTLY!

Originally they were designed to hold all of the Sticks and Stubbies from Stamps by Judith for our Virtual Card Class, but the class is coming to a close and I have some fun things I could be using these bad boys for!

Although the buckets are great for the stick style stamps, I needed a home for my other stamps as well.  While Mom and I were perusing through Ikea last week, we came across the hanging baskets designed to be used with the rods.  I am SO HAPPY mom talked me into buying a couple of them.  They are WONDERFUL!  I may just have to get a few more rods and some more baskets to help with some of my overflow from the stamp show!

I love seeing all of my stamps!  I am definitely a visual person and this will definitely help in the use of some of my forgotten stamps as well as help me to NOT buy the same stamp twice!   Eeek!!!

I should probably talk to the hubby and see what he thinks.  =)   More rods and baskets?  Or a wonderful wood project?!

Enjoy your week!

Suzanne

Tuesday, February 26, 2013

Dinky Baby Factory

The first time I met Vicki Riley was at a Networking meeting in Gilbert, AZ.  It is 8am and during our little round robin introduction she announces, "Hi, my name is Vicki and I make babies."  As a woman, I am like, ya, well don't we all.  They guys on the other hand almost fell out of their seats!!!  Did she REALLY just say that?

Then she went on to describe said babies.  Lovely cloth doll babies!  Vicki IS Dinky Baby!


Much to the amusement of the ladies and relief from the guys, Vicki has created these fabulous cloth dolls with tons of patterns and adorable kits!  She went from confiscating the dining room table, to stealing the front den and now that she has moved she has her very own Dinky Baby Factory!

Making the Babies!

As wonderful as her dolls are, my FAVORITE piece of Dinky Baby Headquarters is the pattern organization.


All of her patterns have a home in one of those wonderful plastic Sterilite baskets.  Which inspired my very own version of Vicki's organizational method!

Basket of Goodies

Color Families
You can't beat converting a great idea into one that works for your crafting purposes!!!

Be sure to check out Dinky Baby and all the wonderful goings on with Vicki!!!

Thank you, Vicki!!!

Suzanne

Saturday, February 23, 2013

Homes for the Lonely

I love that impulse buy when I am walking down the stamp aisle at Michael's or Joann's.  I KNOW I don't need any more stamps, but I can't help myself.  I don't have THAT kind of dandelion!  And who can have "too" many Paris stamps??  Then I get my bag home and go to put away my stamps and I have no where to put them.  Except to put them in a drawer or a photo box to be lost forever!  To be forgotten and unused.  How horrible is that?!

So lonely and forgotten

Then the clouds parted, the sun shone through and Kim's mom let us in on a little post-Christmas secret.  Kim's hubby made her a super cool wall mounted stamp display!

Kim's Super Cool Display
He even made different shelf sizes so the little ones didn't get lost with the big ones!  How cool is that?!

THEN I was perusing through Pinterest this morning and I saw ANOTHER super cool stamp display that actually HIDES behind the door!

It's like a stamp ninja!
I am a total VISUAL organizer and I love the idea of being able to see all of the stamps.  Of course, my main issue at the moment is not having ANY wall space left in my cottage.  However, I may see if I can talk my hubby into building something similar to Kim's on the side of a book case OR maybe I will have to part with my pretty trellis and throw in a tall stamp ninja shelf next to the bathroom.

Of course, I could confiscate the guest room in the cottage and totally turn that into a Wall of Wonder!  Oooh, I like the sound of THAT one!

How do you organize your single stamps?

Happy Stamping!
Suzanne

Wednesday, February 20, 2013

Organizing Card Classes

I LOVE hosting Card Classes!  Not a "party" fan but classes....HEAVEN!

Classes are fun, organized, and have a wonderful purpose.  There is just a ton of stuff that needs to be done in order to have a successful class.


  1. Cards to make
  2. Supplies to buy
  3. Paper to cut
  4. People to invite
  5. Things to pack up
Knowing what paper you need to cut and how much to buy is CRITICAL when putting together a class.  Doing a guesstimate doesn't always work out well, especially when you are running behind and putting kits together last minute and realize you don't have enough buttons for everyone!  Eeek!

So I put together this great little worksheet to keep me on track.


  1. I list the Class Name i.e. Christmas in July 
  2. The Date of the Class
  3. Attendee Names
  4. How many total are coming (this is CRITICAL)
  5. How much I am charging per person (If someone gets a discount or if they already paid, I will put notes next to their name.)


Next, I start working on the "recipe" card for the cards.  Typically I do 4 cards per workshop, but we are going to look at the first card as our example.


  1. I write the name of the card next to Card #1 i.e. Christmas Stocking
  2. I put how many cards of this particular design we are making (I am going to need this when I start cutting paper!)
  3. Now I start listing out the PAPER supplies and dimensions of the paper on the left hand side under Paper Needed.  i.e. White Card, Black 1st Layer, Real Red 5" x 3"
  4. On the right hand side I put all of the supplies I need to make the card; stamp set name, ink colors, brads, dimensionals, ribbons, etc.


Now that I have all of my recipe cards finished and I know what supplies I need, I separate them into categories.  This is going to help me when I pack up to head out to do the class AND it will help me determine if I need to order any additional inks, ribbons, markers, etc.


Paper cutting can be a NIGHTMARE!!!!  Especially if your cards have a lot of layers to them.  Which is where your recipe cards come in handy!  On the Paper and Ribbon to Cut page I write in how many people are attending the class and the # of cards they are making of each design.  They I multiply that number and that is how many of each paper I need to cut.

Then I make the list of paper that needs to be cut gleaming the information from the recipe card.

Next, I list out the quantities and the paper size and color just like I did on the recipe card.  As I cut the paper, I mark it through so I know not to duplicate my efforts.


Woo hoo!  Almost done!  Now that I have all the supplies listed, paper that needs to be cut, I can figure out what supplies I need to order from Stampin' Up! before the big day!


 At the end of my worksheet, I have my final check list of what to do and what to bring with me to the class.

This worksheet has been a LIFESAVER for me with all of my classes!  Feel free to copy my layout and design OR if you would like the Word version of my Workshop Checklist, just let me know and I will get it over to you!

Enjoy!!!
Suzanne

Tuesday, February 19, 2013

Playing with Evernote

I was perusing through one of the Forums on the Stampin' Up! website and noticed a lot of people talking about Evernote.  I had NO clue what it was and assumed it was Mac's version of One Note.  Nope, I was wrong!  (Thankfully!)  After asking hubby if he had heard of it and if it was a "Mac thing" I went to my next information source....Facebook!  (Had NO IDEA my little brother was up in the know of new technology gizmo's!  Way to go, Jake!)

After getting feedback, watching a video that Brina sent me and downloading the software to every imaginable device I could find, I started to play with this new discovered green elephant software.  Ok, fine, I was banned from the house while the hubby watched Walking Dead and decided I didn't have anything better to do and I started to play!  =)

The ladies from SU were talking about using it to organize stamp sets. Although, I have a nifty antiquated way of organizing my stamps I thought I could give it a whirl and see how it works out!

So I grabbed my notebook of stamp sets and set out for the Stampin' Up! online store and started grabbing stamp set images and pasted it into my new Stamp Set Notebook on Evernote.

Once I pasted it, I labeled it with the name of the Stamp Set AND the location of where I have it in my collection.

Then I added "tags".  I tagged it depending on holiday or theme so when I did a search for Birthday, any stamp set I had with birthday anything they will pop on up on my screen.


This a screen shot of the stamps in my collection or notebook and I did a search for "Christmas".  It pulled up all of the stamp sets that have something to do with Christmas AND I can easily see the complete stamp set in the thumbnail view.  If you notice at the top it says, "Ornament Keepsake - Yellow 38".  That is telling me the name of the set is Ornament Keepsake and it is in the Yellow container and is number 38.  Now I know EXACTLY where to find the stamp set in my vast collection!

As nice as this view is, I think I like the Snippet view better.  The information I want in front of me is the stamp location.  So I click View and change it to Snippet.


I still get most of the stamp set view, but in the middle column you will notice I can now see the name of the Stamp Set AND the location.  YEAH!!!!

So far I am enjoying Evernote and I can't wait to get all of my stamps listed in the notebook.  It is going to be tedious and time consuming, but I think in the end it will pay off.  Definitely missing my daughter right now!  She could be doing a lot of this for me!  =)

I am also thinking of other nifty ways to use Evernote!  I think I am going to try doing a bit of out of sight out of mind inventory and see how that works!  How would you like to know that if you forgot where you put your crystal effects you could simply type it into Evernote and voila!  It pops you back with a picture of your revered product and WHERE it is!   Oh the time it could save!!!

I will keep you posted!

If you use Evernote, what do you think?  How do you like it?  What do you use it for?

Happy Stamping!

Suzanne

Saturday, February 16, 2013

Calling All Craft Rooms!

What do you LOVE about your craft room?  What works AMAZING for you?!  I am going to be featuring super cool craft rooms on my blog!  So if you would like to participate, please either shoot me an email with your pictures along with WHY you love it OR let me know if you already have your little piece of heaven up on your blog and I will link to it!  I would, however, like to "interview" you so please be sure and message me!

Can't wait!!!!!!

Email Suzanne your super cool craft room!

Happy Crafting!

Suzanne

Thursday, December 20, 2012

Glittery Organizing Fun!


Who says functionality can't have a bit of glitter?  Can I just say I love Hobby Lobby and Michael's?  I went down to Gilbert to visit family over the weekend and I just had a ball!  Shopping, shopping and more shopping!  (Sorry, honey!)

I needed some fun things to put cotton balls, marbles, extra Dimensionals, Dazzling Details, Twine, Sanding Blocks, misc. stamps and other tools that I need to have handy.  So I picked up a few pails at Hobby Lobby and then my mom found this great turquoise glittery buckets that I HAD TO HAVE!  So now all of my goodies have happy homes!

The green box on the bottom has all of my wheels and the blue one has my misc stamps from Rubbernecker.

The little buckets and pails have all the cotton balls, marbles, Dimensionals, etc. and they are right here at my work station!  No more going over to the cabinet to find the cotton balls!

The skinny green and blue polka dot box has a nifty drawer organizer in it and has some creative embellishments in it so I can see them all at one time.  It is like my own little treasure chest of fun!

The sparkly boxes on top I picked up at Target and they are just there because they are too darn cute and fit perfectly with my shelves!  Absolutely no purpose other than making me happy!

=)

Wednesday, December 19, 2012

Card Class Survival Kit

My Bunky Bag
My mom makes these cute little Bunky Bags for all sorts of goodies; groceries, books, pets and card class!  These little guys are the perfect size for our Card Class Survival Kit!  Filled with all the things you need when going to Card Class!

The Inside
Here is the inside of my cute little Bunky!  I just LOVE the colors!!!!!  But I have all the goodies I need to go to class!

So what exactly is in the Survival Kit?  Well, whatever you feel YOU need to survive Suzy's Card Classes!  Scissors, chocolate, booze...kidding!  Maybe!!!  I could fit a little bottle of champagne in this baby!

The Survival Kit Contents
Alas, no bubbly in this Bunky, but there is CHOCOLATE!  THAT is a key item in the Card Class Survival Kit!  Along with a little trash can, extra sponge, chocolate, double sided sticky tape, wipes AND Kleenex to dry off, scissors, the Pick Me Up for those pesky pearls and rhinestones, Embossing Buddy, Dimensionals, distressing tool, marker to sign the back of my cards with and a Blender Pen!

What all do you put in your Card Class Survival Kit?  What can you NOT live without when making cards out and about with your closest friends???

Supplies and More Supplies


Who says trash needs to be ugly?  Or in this case, extra trash bags, packing tape, envelopes for bills (ugh), paper for the printer and extra cards!  This stacking rack just used to be piled with crap, lots of crap!  So during our wintery jaunt Wal-Mart, I picked up the green and turquoise cubes and voila! Instant prettiness!  The green one has the trash bags and packing tape.  The blue one has my big envelopes for work and the big envelopes for bills.  They all fit perfectly!

Since we get soooooo much dust here in Bloomfield, I put my extra paper in the clear tubs above the cubes. It keeps the paper safe and dust free!

I had picked up a bunch of photo boxes at Michael's in the springtime that matched my cottage colors and I keep the extra cards I have from classes along with the extra kits!  So much easier than hiding them under the tables and having to crawl under them to figure out what I have left!  Plus they were only $1!  Can't beat that for cute and resourceful!  I am sure my husband is wishing I was that cheap, because I got cute AND resourceful down pat!  ;o)

Wait til you see the really cute stuff tomorrow!!!!!  It glitters!!!!!

Tuesday, December 18, 2012

More Organizing Fun

OK so I couldn't drag a bunch of the stuff that needed to go up in the loft so it looks like I got to play in my cottage after all today!  Woo hoo!

Last week was just absolute insanity with making cards and during that time I realized that I needed to be a bit more productive and I needed a few more things in place to make sure I was utilizing supplies and my time more efficiently!  My hubby nicely took me out in a snow storm and I was able to pick up a few much needed supplies to make my life a whole lot easier!

One of my biggest issues/messes/great consternations are my scrap papers.  I love to keep my scrap paper and there is no reason to throw it away especially when I need it!  So I used to put them in big gallon baggies by color family and store them in some cute boxes.

Green, Blue and Purple Boxes full of scraps
And you know, there was nothing really wrong with that system, except let's face it, I am lazy.  I had to get the boxes down, find the right baggie, open it up and find the piece of paper I am looking for.  Plus the clean up was tedious!  I had to sort the scraps, pull down the boxes, find the right baggie, yadda yadda yadda.  Way too much work!  Especially when I am making 30 to 50 cards a day!

Soooooo, I switched up my method!


I picked up two 12x12 plastic 3-drawer systems at Wal-Mart for $12 and each drawer has a color family!  I just whip it open throw in scraps I am not using or pull out the little drawer and grab out the piece I need!  The green box you can kind of see at the top does hold all of my white and ivory paper because I use that the most and most of the time I need to size it so I can just take the whole box with me.

I can't tell you how wonderful this new system has been and how much time it has saved me!

Love, love, love, love!!

Sunday, December 16, 2012

Re-Organization of the Cottage

Spending VERY LONG hours in the cottage making a slew of cards has really jump started the "re-organizing of the cottage" project.  It started out as just a couple of tweaks, but now that I have totally been engrossed in the functionality of my space I need to get some things changed pronto!

Last weekend, my hubby braved the snowy weather and took me to town to pick up a few emergency supplies and this weekend I have been having a blast at Michael's and Hobby Lobby with my family back in Gilbert!  Oh my gosh!  Wait til you see some of the fun things I picked up to help organize all of my goodies!

Although a few things are going to need to be re-organized, I am happy to report that my color organization and stamps are still AMAZING!  Talk about life savers when it came to making cards this past week now I just need to get the rest of the cottage running just as smooth!

I promised my honey that I would get our room and office organized on Tuesday, but Wednesday...oh, that is all my cottage!!!!!!!  Unless I sneak away and do a little bit of work on my "breaks" from the house!  he he he

I will post pictures of some of the changes when I finish them up along with pictures of the cards I have been working on as soon as I get back home.  I totally forgot my camera cord so pics will have to wait!

Until then, stay warm!!!

Suzanne

Friday, June 15, 2012

Thank You for Visiting

Vinnie our Mascot!

Thank you so much for taking the tour of Gooseberry Cottage and seeing where I get to play with all of my pretty papers and stamps!  My husband has truly outdone himself and this was a HUGE labor of love on his part. (I may need to be reminded of that next time he pisses me off! he he he)

There will be some tweaking and some improvements along the way as well as some new organizational epiphanies so I will be sure and share!

Until next time,

Happy Stamping!

Suzanne

Thursday, June 14, 2012

All My Supplies

All of My Color Fun
 THIS is my favorite part of Gooseberry Cottage!  I used to lie awake at night dreaming of this!  It was driving me crazy that I couldn't start it when I lived in Gilbert and that I had to wait to get to New Mexico!  Every time I would make a card and I had to go to 3 or 4 different areas in my studio to get what I needed it would irritate me so much!  Now that I am here I am in HEAVEN!

So here is my theory!  The baskets are organized by color family and then they flip flop between hears and butterflies so I know when one color family ends and another begins.

Goodies in the Baskets

Here is what inside the baskets look like!  Each basket as the ink, ribbons, buttons, brads, refills, sponges, extra ribbon pieces I didn't use or even punched out labels, butterflies, etc.  It is all in one place!  I can them all at my fingertips and I love it!  I have also realized that when I have everything out before me I find new uses for some of the accessories I would forget about!  LOVE IT!!!!

Close up of my baskets

Keeping Them Safe
Right now I am surrounded by DIRT!  A LOT OF DIRT!  Everything in my cottage has a thin layer of dirt and I have been here a week!  It is driving me insane!  But my hubby and son are busting their backs to get my courtyard finished and gravel and grass in so it will cut down on all of this yuckiness!  In the meantime, he installed these gorgeous frosted glass doors on my shelving units to keep them safe and dust free!


I can't tell you how much I love this organizational system and how much time it saves me!  Plus it didn't cost me a lot at all!  $49 for the Billy bookcase, $70 for the doors, and the baskets were $1 a piece on Amazon!

LOVE IT!

Wednesday, June 13, 2012

Stamps, Stamps and More Stamps!

Back in March we talked about how I organize all of my stamps with my little dot and journal system.  Well, here is the finished project!


Each wood mounted stamp case size has its own color and mostly its own shelf.  I had to combine a couple of the sizes due to space, but the majority of them have their own shelf.  You can check out the method of my madness on my earlier blog posts!  Part One - Part Two.


All of my clear stamps are in the Benno shelves from Ikea, the other shelving unit is the Billy from Ikea.  LOVE THEM!  My clear stamps are all alphabetized with some space in-between to add more sets from the new Stampin' Up! catalog that came out!  Oh ya, baby!

I cannot tell you how happy this little system makes me!  And it seriously takes up a 4 foot wall that we thought was going to be a dead space!   Woo hoo!!!!

Tuesday, June 12, 2012

Virtual Card Class Sticks and Stubbies

Monthly Bucket
Before my little kits for the Virtual Card Class go out, this is where they live!  So there you go, a sneak peak at next months goodies!  It is so easy to just grab the bucket and sort away!


And here they are!  The stamps for the next 6 months!  (With my untidy cords!  Still need to fix that!)

Monday, June 11, 2012

Keeping it Close

At My Fingertips
Pier One Imports was totally picking up my vibe on colors for Gooseberry Cottage!  I picked up so many cool accessories and I love them all!  I used this super cool basket to keep all of my tape, pearls and rhinestones.  It is all together in one place and each to access and looks great on my workstation!


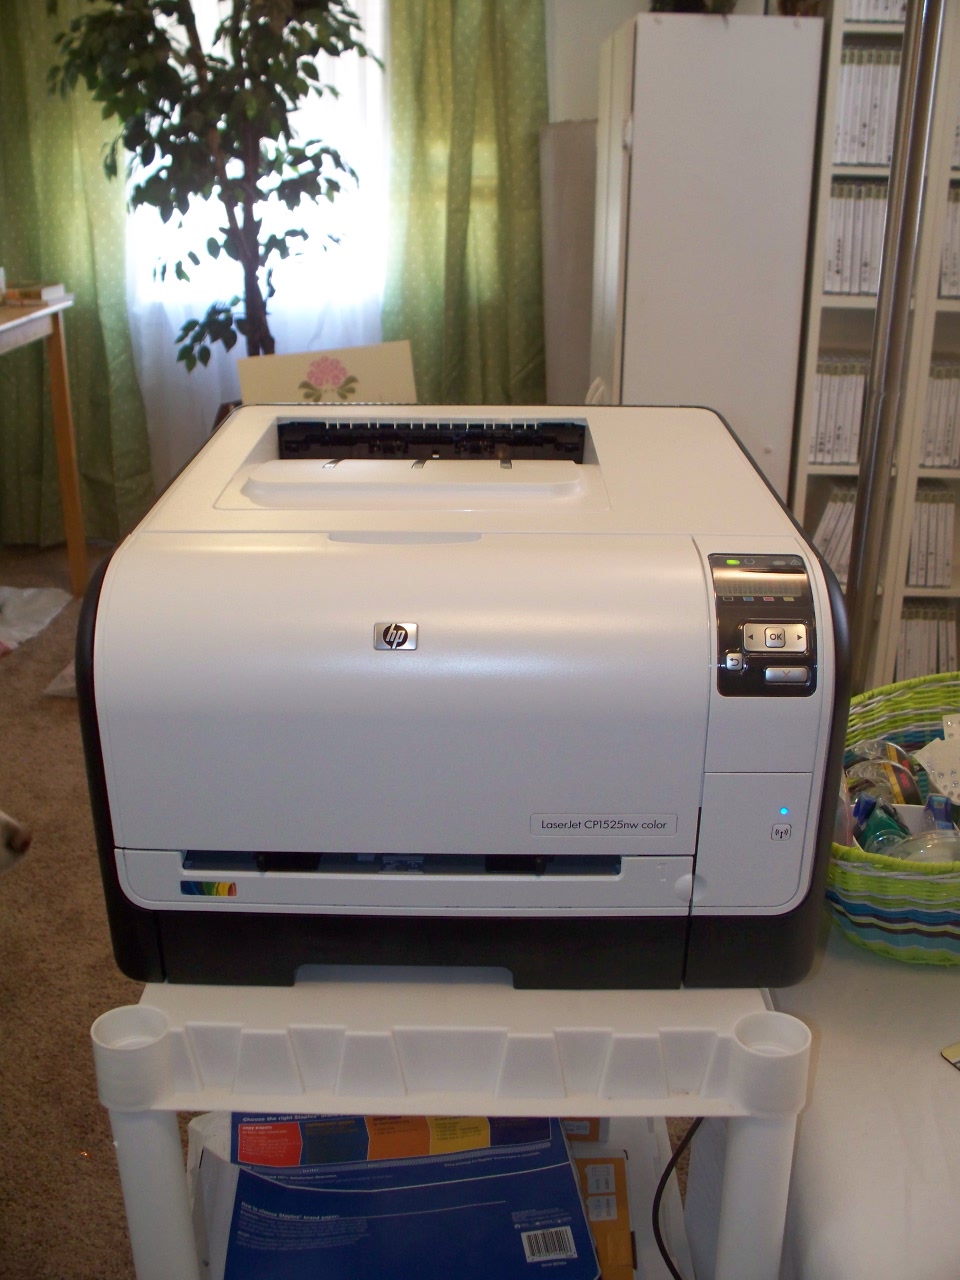
And this is the bad boy my hubby ran out and hunted all over town for!  We had two fatalities during the move and one was my color printer!  I had it safely tucked into the back of my Prius to keep it safe from the movers and silly me forgot it was back there and I opened the hatch and out it fell.  It promptly busted into a million pieces and I had a few foul words spew forth from my lips and a possible kick to a shattered piece.  (Note to self, don't kick sharp plastic objects while wearing flip flops...it doesn't feel good!)

And do you know what that little blue light in the right hand corner means?  WIRELESS!!!   AND to top it off it actually works!  Happy dance!!!!